We use cookies to help improve our services, make personal offers, and enhance your experience. If you do not accept optional cookies below, your experience may be affected. If you want to know more, please read the Learn more.


The HoodMart Guide To Cleaning and Maintaining Your Exhaust Hood System
The HoodMart Guide To Cleaning and Maintaining Your Exhaust Hood System
- December 23, 2017
Categories: Hoods
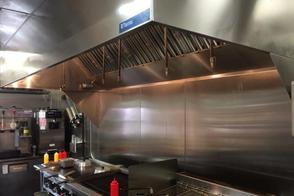
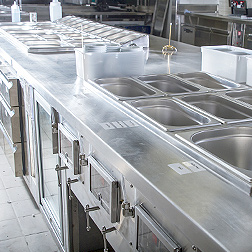
Exhaust hood systems play a vital role in maintaining a clean and safe environment in commercial kitchens. These systems work tirelessly to remove grime, dust, grease, and other airborne particles from the air. However, to keep your exhaust hood system operating efficiently, it's crucial to clean and maintain its stainless steel hood filters regularly. In this guide, we'll walk you through the steps to clean your hood filters effectively, ensuring your exhaust system works at its best.
Why Cleaning Your Hood Filters Matters
Stainless steel hood filters are excellent at capturing airborne particles, but they can become clogged with grease and dirt over time. When filters get too clogged, several issues can arise:
Reduced Cleaning Efficiency: Clogged filters hinder the exhaust system's ability to clean the air effectively.
Increased Workload: The system has to work harder to compensate for blocked filters, potentially causing damage.
Now, let's dive into the step-by-step process to clean your hood filters:
Step 1: Remove the Filter
Start by removing the air filter from your exhaust hood system. Inspect it for any damage. If the filter is damaged, consider replacing it; otherwise, proceed to the next step.
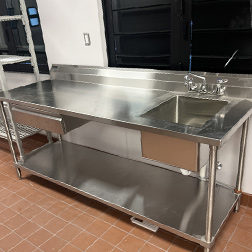
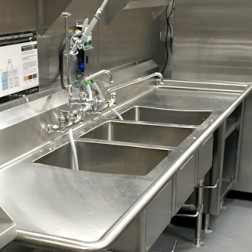
Step 2: Prepare a Soaking Station
Fill a kitchen sink or any large receptacle with very hot water. The hot water will help break down grease and grime, making the cleaning process easier.
Step 3: Create Your Cleaning Solution
For an effective and chemical-free cleaning solution, combine 1/2 cup of baking soda with enough dish soap to create a paste. If needed, you can double the recipe to make more solution.
Step 4: Soak the Filters
Pour the cleaning solution paste into the hot water and mix it in thoroughly. Submerge the filters in the solution and allow them to soak for 10 to 15 minutes.
Step 5: Scrub with a Non-Abrasive Brush
After the soaking time has elapsed, remove the hood filter from the solution and scrub it thoroughly using a non-abrasive cleaning brush. This should help remove excess filth and grease. If necessary, you can re-soak the filter and scrub again.
Step 6: Rinse and Dry
Once you are satisfied with the cleaning, rinse the filter with water to remove any remaining cleaning solution and dirt. Then, let the filter dry completely.
Step 7: Reinstall
When the filters are clean and dry, reinstall them back into the exhaust hood system.
By cleaning your filters regularly, they should remain relatively easy to maintain. However, if grease and dirt build up to a point where thorough cleaning becomes challenging, consider replacing the filters. We recommend cleaning your hood filters every 6 to 8 weeks, which should be part of your routine maintenance, especially when you engage professional hood cleaning services.
About HoodMart
HoodMart provides a wide range of exhaust hood systems, including Compensating (Short Cycle) and Perforated Supply Plenum (PSP), as well as essential accessories like no-weld grease ducts, hood filters, canopy hood lights, and curbs. We also offer a variety of walk-in refrigeration systems to meet your specific needs.
If you have any questions about purchasing your hood system or need expert advice, don't hesitate to reach out to our team. You can contact us at 1.855.334.8563 or use our convenient live chat system. We're here to ensure your kitchen stays clean, safe, and efficient with top-notch exhaust hood solutions.
 CUSTOM FABRICATORRECEIVE INSTANT QUOTE
Loading Fabricator...
PROJECT ID : T500PROJECT NAME :
Already have a project?
Login
WELCOME
START YOUR PROJECT »
MOST PROJECTS BUILT IN
1-2 WEEKS!
1-2 WEEKS!
CHOOSE CATEGORY

Worktables
Shelving
Counters & Cabinets

WELCOME TO OUR SHOP
PROJECT DETAILS
MANAGE PROJECTS
Save your current project, or modify your previous projects
CURRENT PROJECT
PROJECT NAME :
PREVIOUS PROJECTS
No Projects found.
Thank you for
creating your project with
North American Kitchen Solutions!
Account Login
Have a design in mind? Contact Us for a Free Consult
*(Opt-in to receive SMS and/or Email Promotions) By checking this box you agree to receiving periodic text messages, from our team to your phone number(s)
Recent Posts


CONTACT FORM
VIDEO LIBRARY
Blog Home


Unsure which hood is right for you?
Try our hood builder!

Search

FINANCING AVAILABLE
CLICK HERE For More Details
Dont see your size or need a custom hood?
Let Us Help You!
Talk to a Specialist
Call Now: 1.800.715.1014